
Style Guide
Page Editing
New Sections
When creating a new page, you start by adding a new section. Sections are how you can break up content and group similar items together within their own sections. You can either select one of the existing section templates provided by Squarespace or opt for a blank section that you can edit and add things as needed.
How to add a new section to your page:
01. Open up your page in editor mode.
02. If the page doesn’t currently have any sections, you’ll be prompted by a button to add a section. If you already have a section on the page, select one of them and a blue button on the top or bottom of the section title “Add Section” will appear.
03. A menu of Squarespace templates will then appear. These are categorized by section type and offer examples of how content can be laid out. If none of these options fit your needs, you can opt for the “Add a blank section” option as well.

O4. Once you’ve decided on a section and selected that option, it will be added to your page and you can begin editing accordingly.
05. Don’t forget to save!
Drag and Drop
Recently Squarespace updated its platform to utilize a drag-and-drop feature where content can be placed anywhere on the page. This allows you to truly customize all aspects of your site.
How to use Squarespace’s drag and drop features:
01. Open up your page in editor mode.
02. Add a new page section.
03. Select the section you’d like to add content to. A button title “+Add Block” will appear in the top left corner.

05. A menu will appear that shows all the different content options that you can add to the page (eg. Text, Images, Accordions, etc). Select any block you would like to use and it will be added to the page.

06. You can then drag that block to wherever you want it to be on the page.
07. You can also increase or decrease the size of the block by selecting and dragging the blue box that surrounds the selected content.
Editing For Mobile Devices
Make sure to double-check your content in mobile view. Sometimes where a block is placed doesn’t translate correctly in mobile, so you may have to re-arrange, shrink boxes, and adjust spacing accordingly.
To edit content in mobile view, select the mobile icon in the top right-hand corner. The editing screen should then shrink and appear as it would on a mobile phone. Here you can then begin moving content around accordingly to make sure everything reads well on a smaller screen.


Page Banners

How to add a page banner:
01. Within the page editor, add a new section - out of the options, make sure to select a blank section.
02. Once the section has been added, make sure to select the space and click on “Edit Section”.


03. Select colours from the menu and choose “Bright 1”. This should change the background to a light blue colour.
04. Exit out the menu by selecting anywhere on the screen.
05. Select the space once again and this time click “Add Block”. Make sure to choose the code block option.
06. You can then drag and drop the text block anywhere within the grid. For the purposes of the page banner, make sure to keep it on the left-hand side.
07. Select “code block” and click on the pencil icon. You will then be brought into a code editor. Paste in the following code, making sure to change “TITLE” to the title of your choice.
<h1 style=”font-size:30px;”>TITLE</h1>
08. Once you’ve dropped in that code, exit out of the code block and go back into the section editor.
09. Within format, make sure the specs match the following:

10. Don’t forget to save!
Styling/Design
There are two ways you can access the page design area:
01. When you first open your Squarespace, you can “Select Design” from that initial menu.

02. When it page editor mode, a brush icon will appear in the top right corner.
How to change the design of your site:
01. Once you’ve opened the design menu (it should appear on the right-hand side of your screen) you can begin making adjustments to your site.
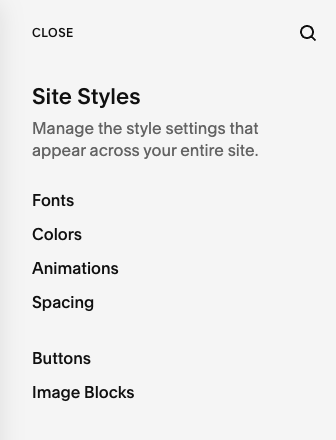
02. Here you can select an area of the site that you would like to change.
Within Fonts, you can change all your heading and paragraph text fonts. Just select the text you’d like to change and you can choose from the available fonts on Squarespace.
When changing colours, you’ll see each of your page sections is linked to a different theme. To change the colour, select the theme according to the section you want to see changed. For each theme, you can change everything from the background colour, and overlays, to the link text.
As of right now, there are no animations being used on your site. If you want your site to fade in or scale to size, you can do so within this area.
Spacing only includes the option to change the width and height of your site. It is recommended to leave this area alone.
Your site has three button options: Primary, Secondary and Tertiary. The site is currently only making use of the primary option. If you wanted to change the look of the buttons used on the site currently, you can adjust the font, shape, outline and size for the primary button option.
Image blocks allow you to adjust the styling of the different image options. If you changed the image into a card block, you could come in here and adjust the Image Block: Card styling.
03. Once you’ve adjusted the styles of your site, make sure to click the close button and save your page to make the design changes live.
Images
Images in Code Blocks
These images are used within the code block on the projects page. Do not delete these images, as we need active URL links in order to source them within the code block.


Image Credits
How to add an Image Credit:
01. Below an image that’s sourced through one of your colleagues, add a new code block.
02. Open up the code editor.
03. Past in the following code, making sure to swap out the details for the credits information:
<p style="font-size:14px; text-align:center;">Photos by Name | <a href="https://theirwebsite.com/" target="_blank">TheirWebsite.com</a></p>
04. You can then drag and drop the credit where you want it to be.
05. Don’t forget to save your page.
Canva Files
For any images with fun background elements (dots, triangles, etc), these were created within Canva and exported as PNGs. If you wanted to make edits or create your own options, you can access the current files through the following link.
Note: This is a template, so you will be required to make a copy in order to begin editing.
Text Backgrounds
How to add text backgrounds:
01. Add a text block to your page or select a text block that is already on your page.
02. When selected, click on the pencil icon.

03. Once selected, a small design menu will appear. Toggle on the Background option.

04. Once toggled on, a few more design options will appear. Make sure the padding is small, so the background doesn’t take up to much space on the page.

05. The background will be grey by default but you can go into page styling and adjust the colour to whatever you would like it to be.
06. Don’t forget to save!